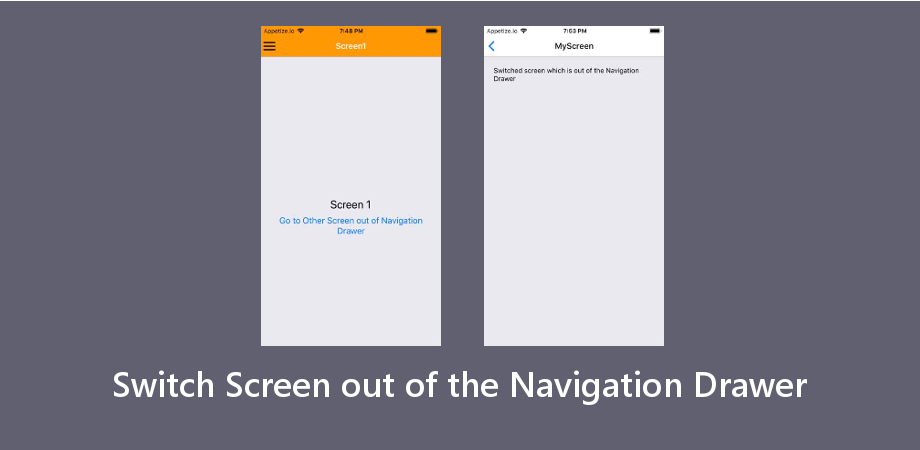
React Native使用最新导航将屏幕从导航抽屉中切换出来
这是一个例子 在 React Native 中将屏幕从导航抽屉中切换出来。我们将在本示例中使用 react-navigation 制作导航抽屉。我希望您已经看过我们关于 React Native 导航抽屉的上一篇文章,因为在这篇文章中,我们只是扩展了上一篇文章以切换出导航抽屉。
在这个例子中,我们将在导航菜单中有一个带有两个屏幕的导航抽屉,第一个屏幕上的两个按钮用于打开带有导航抽屉的屏幕,另一个按钮用于在不带导航抽屉的导航抽屉中打开一个新屏幕。
将屏幕切换出导航意味着我们将打开独立于导航抽屉的屏幕。
为此,我们将创建一个 抽屉导航器 然后将其放入 堆栈导航器 作为一个 堆栈.屏幕 和 屏幕外部。因此 Drawer 将是一个组,而 ScreenExternal 将是一个独立的实体,并成为根堆栈导航器的一部分。
推荐:如何隐藏导航抽屉侧边栏中的导航选项
抽屉导航器
<Drawer.Navigator>
  <Drawer.Screen
    name="FirstPage"
    options={{
      drawerLabel: 'First page Option',
      activeTintColor: '#e91e63',
    }}
    component={firstScreenStack}
  />
  <Drawer.Screen
    name="SecondPage"
    options={{
      drawerLabel: 'Second page Option',
      activeTintColor: '#e91e63',
    }}
    component={secondScreenStack}
  />
</Drawer.Navigator>
堆栈导航器
<NavigationContainer>
  <Stack.Navigator>
    <Stack.Screen
      name="Home"
      component={Home}
      options={{headerShown: false}}
    />
    <Stack.Screen
      name="ScreenExternal"
      component={ScreenExternal}
      options={{
        title: 'External Screen', //Set Header Title
        headerStyle: {
          backgroundColor: '#f4511e', //Set Header color
        },
        headerTintColor: '#fff', //Set Header text color
        headerTitleStyle: {
          fontWeight: 'bold', //Set Header text style
        },
      }}
    />
  </Stack.Navigator>
</NavigationContainer>
在此示例中,我们将制作一个包含三个屏幕的导航抽屉,一个在导航抽屉中打开的 ScreenInternal 和一个将作为独立屏幕(在导航抽屉外)打开的 ScreenExternal。让我们开始吧。
制作 React Native 应用
开始使用 React Native 将帮助您更多地了解如何创建 React Native 项目。我们将使用 react native 命令行界面来制作我们的 React Native 应用程序。
如果您之前安装了全局 react-native-cli 包,请将其删除,因为它可能会导致意外问题:
npm uninstall -g react-native-cli @react-native-community/cli运行以下命令创建一个新的 React Native 项目
npx react-native init ProjectName如果你想使用特定的 React Native 版本启动新项目,你可以使用 –version 参数:
npx react-native init ProjectName --version X.XX.X注意如果上述命令失败,你可能有旧版本的 react-native 或者 react-native-cli 已全局安装在您的电脑上。尝试卸载 cli 并使用 npx 运行 cli。
这将在您的项目目录中创建一个项目结构,其中有一个名为 App.js 的索引文件。
安装依赖项
对于导航抽屉,我们需要添加 react-navigation 以及其他支持依赖项。
要安装依赖项,请打开终端并进入你的项目
cd ProjectName1. 安装 react-navigation
npm install @react-navigation/native --save2. 其他支持库 react-native-screens 和 react-native-safe-area-context
npm install react-native-screens react-native-safe-area-context --savereact-native-screens 软件包需要一个额外的配置步骤才能在 Android 设备上正常工作。编辑 MainActivity.java 文件位于 android/app/src/main/java//MainActivity.java。
将以下代码添加到 MainActivity 班级:
@Override
protected void onCreate(Bundle savedInstanceState) {
  super.onCreate(null);
}
并确保在此文件顶部的包语句下方添加以下导入语句:
import android.os.Bundle;需要进行此更改以避免与视图状态在 Activity 重启时不一致而导致的崩溃。
3. 安装抽屉导航器
npm install @react-navigation/drawer --save4.现在我们需要安装并配置安装react-native-gesture-handler 和 react-native-reanimated 抽屉导航器所需的库:
npm install react-native-gesture-handler react-native-reanimated --save配置 react-native-reanimated 将 Reanimated 的 Babel 插件添加到你的 babel.config.js (重新动画的插件必须列在最后。)
module.exports = {
  presets: (
    ...
  ),
  plugins: (
    ... ,
    'react-native-reanimated/plugin'
  ),
};
配置 react-native-gesture-handler,在入口文件的顶部添加以下内容(确保它在顶部,并且之前没有其他内容),例如 index.js 或者 App.js
import 'react-native-gesture-handler';注意:如果您正在为 Android 或 iOS 构建,请不要跳过此步骤,否则您的应用即使在开发过程中运行良好,也可能会在生产中崩溃。这不适用于其他平台。
5. 这些步骤对于抽屉导航来说已经足够了,但在这个例子中,我们还要在屏幕之间移动,所以我们还需要 Stack Navigator
npm install @react-navigation/native-stack --saveCocoaPods 安装
请使用以下命令安装 CocoaPods
npx pod-install推荐:如何在Microsoft Excel中使用规划求解插件
项目结构
要开始此示例,您需要创建一个名为 页面 在你的项目中创建四个文件 FirstPage.js, SecondPage.js, ScreenExternal.js, 和 ScreenInternal.js 在里面。

打开抽屉式导航栏外屏幕的代码
现在在任何代码编辑器中打开 App.js 并将代码替换为以下代码
App.js
// Switch Screen out of the Navigation Drawer
// https://aboutreact.com/switch-screen-out-of-the-navigation-drawer-in-react-native/

import 'react-native-gesture-handler';

import * as React from 'react';

import {NavigationContainer} from '@react-navigation/native';
import {createNativeStackNavigator} from '@react-navigation/native-stack';
import {createDrawerNavigator} from '@react-navigation/drawer';

import FirstPage from './pages/FirstPage';
import SecondPage from './pages/SecondPage';
import ScreenInternal from './pages/ScreenInternal';
import ScreenExternal from './pages/ScreenExternal';

const Stack = createNativeStackNavigator();
const Drawer = createDrawerNavigator();

const FirstScreenStack = () => {
  return (


  );
};

const SecondScreenStack = () => {
  return (


  );
};

const Home = () => {
  return (


  );
};

const App = () => {
  return (


  );
};

export default App;
在任何代码编辑器中打开 pages/FirstPage.js 并用以下代码替换代码。
FirstPage.js
// Switch Screen out of the Navigation Drawer
// https://aboutreact.com/switch-screen-out-of-the-navigation-drawer-in-react-native/
import * as React from 'react';
import {
SafeAreaView,
StyleSheet,
View,
Text,
Button
} from 'react-native';
const FirstPage = ({navigation}) => {
return (
Switch Screen out of the Navigation Drawer
{'\n'}
This is the First Page
Switch to an external screen without navigation drawer
React Navigation Drawer with Sectioned Menu
www.aboutreact.com
);
};
const styles = StyleSheet.create({
container: {
flex: 1,
alignItems: 'center',
justifyContent: 'center',
},
textStyle: {
fontSize: 18,
textAlign: 'center',
},
footerHeading: {
fontSize: 18,
textAlign: 'center',
color: 'grey',
},
footerText: {
fontSize: 16,
textAlign: 'center',
color: 'grey',
},
});
export default FirstPage;在任何代码编辑器中打开 pages/SecondPage.js 并用以下代码替换代码。
SecondPage.js
// Switch Screen out of the Navigation Drawer
// https://aboutreact.com/switch-screen-out-of-the-navigation-drawer-in-react-native/

import * as React from 'react';
import {
  SafeAreaView,
  StyleSheet,
  View,
  Text
} from 'react-native';

const SecondPage = () => {
  return (


            Switch Screen out of the Navigation Drawer
            {'\n\n'}
            This is the Second Page


          React Navigation Drawer with Sectioned Menu

        www.aboutreact.com


  );
};

const styles = StyleSheet.create({
  container: {
    flex: 1,
    alignItems: 'center',
    justifyContent: 'center',
  },
  textStyle: {
    fontSize: 18,
    textAlign: 'center',
  },
  footerHeading: {
    fontSize: 18,
    textAlign: 'center',
    color: 'grey',
  },
  footerText: {
    fontSize: 16,
    textAlign: 'center',
    color: 'grey',
  },
});

export default SecondPage;
在任何代码编辑器中打开 pages/ScreenExternal.js 并用以下代码替换代码。
ScreenExternal.js
// Switch Screen out of the Navigation Drawer
// https://aboutreact.com/switch-screen-out-of-the-navigation-drawer-in-react-native/
import * as React from 'react';
import {
SafeAreaView,
StyleSheet,
View,
Text,
Button
} from 'react-native';
const ScreenExternal = ({navigation}) => {
return (
Switch Screen out of the Navigation Drawer
{'\n\n'}
This is External Screen
React Navigation Drawer with Sectioned Menu
www.aboutreact.com
);
};
const styles = StyleSheet.create({
container: {
flex: 1,
alignItems: 'center',
justifyContent: 'center',
},
textStyle: {
fontSize: 18,
textAlign: 'center',
},
footerHeading: {
fontSize: 18,
textAlign: 'center',
color: 'grey',
},
footerText: {
fontSize: 16,
textAlign: 'center',
color: 'grey',
},
});
export default ScreenExternal;在任何代码编辑器中打开 pages/ScreenInternal.js 并用以下代码替换代码。
ScreenInternal.js
// Switch Screen out of the Navigation Drawer
// https://aboutreact.com/switch-screen-out-of-the-navigation-drawer-in-react-native/
import * as React from 'react';
import {
SafeAreaView,
StyleSheet,
View,
Text,
Button
} from 'react-native';
const ScreenInternal = ({navigation}) => {
return (
Switch Screen out of the Navigation Drawer
{'\n\n'}
This is Internal Screen
React Navigation Drawer with Sectioned Menu
www.aboutreact.com
);
};
const styles = StyleSheet.create({
container: {
flex: 1,
alignItems: 'center',
justifyContent: 'center',
},
textStyle: {
fontSize: 18,
textAlign: 'center',
},
footerHeading: {
fontSize: 18,
textAlign: 'center',
color: 'grey',
},
footerText: {
fontSize: 16,
textAlign: 'center',
color: 'grey',
},
});
export default ScreenInternal;运行 React Native 应用程序
再次打开终端并使用进入您的项目。
cd ProjectName1. 启动 Metro Bundler
首先,您需要启动 Metro,它是 React Native 附带的 JavaScript 打包器。要启动 Metro 打包器,请运行以下命令:
npx react-native start一旦启动 Metro Bundler,它将永远在您的终端上运行,直到您关闭它。让 Metro Bundler 在其自己的终端中运行。打开一个新终端并运行该应用程序。
2. 启动 React Native 应用程序
要在 Android 虚拟设备或真实调试设备上运行项目:
npx react-native run-android或者在 iOS 模拟器上运行(仅限 macOS)
npx react-native run-ios输出截图
在线模拟器中的输出
这就是如何在 React Native 中将屏幕从导航抽屉中切换出来。如果您有任何疑问或想分享有关该主题的内容,您可以在下面发表评论或在此处联系我们。很快会有更多帖子发布。

