如何在Weebly网站中添加图片库
图库是在您的 Weebly建站 网站上展示您的作品集和其他作品的集合图像。 Weebly 提供了一个默认的“图库”元素,可以轻松上传一组图像并自动创建一个漂亮的图库。 在本文中,让我们进一步探讨如何通过以下方式之一在 Weebly 网站中添加图片库:
- 使用默认画廊元素
- 在节元素内使用默认画廊元素
- 创建具有滑动效果的自定义图片库
推荐:如何在Weebly站点中添加多个编辑器
使用默认图库元素在 Weebly 中添加图片库
Weebly 画廊元素在“构建”选项卡下可用,并在“基本”元素组下分类。

Weebly 画廊元素
拖放元素并上传图像以创建图库。 我们建议所有图像都具有相似的尺寸,以使其看起来更专业。

在 Weebly 中添加图库
图库元素有两个自定义选项可用 – 第一个是在单个图像级别,第二个是在图库元素级别。 单击单个图像以添加标题和链接。
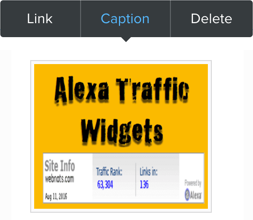
图库的图像选项
然后单击图库(就在图像之外)以查看如下所示的弹出框。
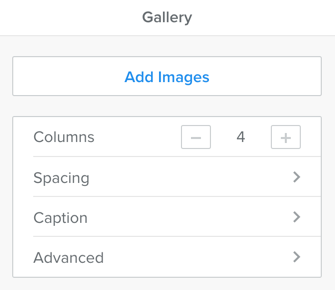
Weebly 图库元素选项
- 调整图库的列数。
- 调整顶部和底部边距间距。
- 标题选项允许您设置单击时图像的外观。 您可以简单地选择灯箱选项或选择显示缩略图。 您还可以打开“悬停时显示标题”选项以在将鼠标移到图像上时显示标题。
- 高级选项允许您设置图像间距、边框和图像比例。
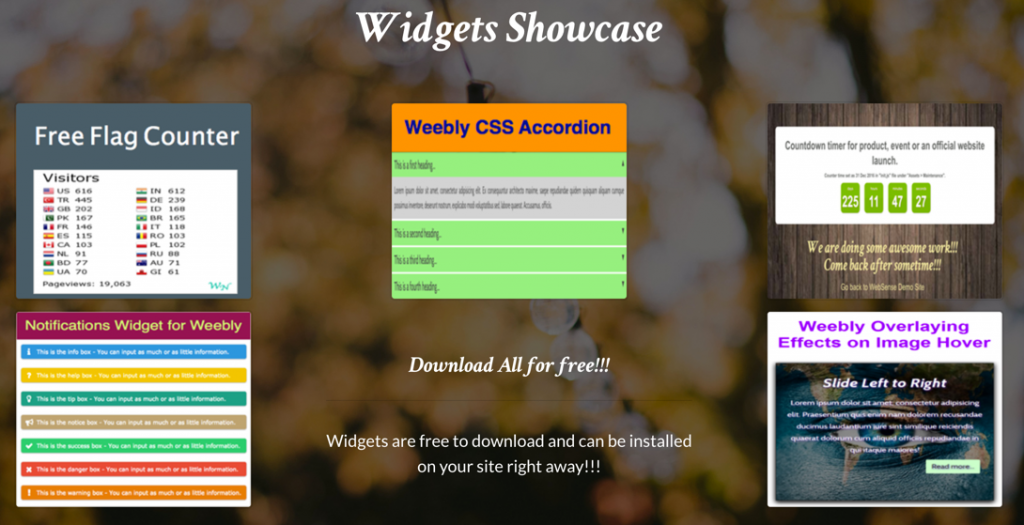
查看图库的预览并发布您的网站。 下面是一个示例,展示了画廊在具有四列的已发布网站上的外观:

Weebly 画廊示例
发布网站后,可以随时将单个图像删除或添加到图库中。
使用截面元素
上述方法将创建一个纯白色背景的画廊。 您可以使用“Section”元素创建一个全宽元素并在其中添加画廊。 通过这种方式,您可以将图像、颜色甚至视频背景(如果您是专业用户)添加到您的图库图像中。
除了使用画廊元素,您还可以使用图像元素来创建画廊效果,如下图所示。
在截面元素上创建画廊效果
在背景图像上具有视差滚动效果的画廊将为您的网站带来美妙的外观。
推荐:如何修复Excel中的#VALUE错误
自定义 Weebly 画廊小部件
最后一个选项是创建自定义图库小部件。 仅当您想在您的网站上使用一两个画廊时,我们才建议您这样做。 下面是带有滑动标题和描述的 Weebly 网站的示例自定义图库小部件。
下面给出了完整的 CSS 和 HTML 代码,您可以使用“嵌入代码”元素嵌入这些代码。 作为一个好的做法,将 CSS(样式标签之间)粘贴到页面的“标题代码”部分下,并使用“嵌入代码”元素嵌入 HTML 代码。
<style>
.wrapper {
width: 100%;
text-align: center;
}
.galery {
display: inline-block;;
position: relative;
width: 200px;
height: 200px;
padding: 0;
margin: 10px;
border: solid 10px #fff;
-webkit-box-shadow: 0px 0px 5px 0px rgba(0, 0, 0, 0.25);
box-shadow: 0px 0px 5px 0px rgba(0, 0, 0, 0.25);
}
.galery img {
width: 200px;
height: 200px;
}
.caption {
position: relative;
display: inline-block;
width: 200px;
height: 200px;
z-index: 10;
}
.caption::before {
content: attr(data-title);
position: absolute;
top: 0;
left: 0;
width: 200px;
height: 0;
font-size: 24px;
background: #ffffff;
overflow: hidden;
-webkit-transition: all 0.3s ease;
-moz-transition: all 0.3s ease;
-ms-transition: all 0.3s ease;
-o-transition: all 0.3s ease;
transition: all 0.3s ease;
}
.caption::after {
content: attr(data-description);
position: absolute;
bottom: -0;
left: 0;
width: 200px;
height: 0;
font-size: 1.1em;
font-weight: 400;
line-height: 1.4em;
color: #fff;
background: #222;
overflow: hidden;
-webkit-transition: all 0.3s ease;
-moz-transition: all 0.3s ease;
-ms-transition: all 0.3s ease;
-o-transition: all 0.3s ease;
transition: all 0.3s ease;
}
.caption:hover::before {
height: 100px;
padding-top:10px;
}
.caption:hover::after {
bottom: 0;
height: 100px;
padding-top:10px;
}
</style>

<ul class="wrapper">
<li class="galery">
<a class="caption" href="#" data-title="Here is a Title" data-description="Here is your short description">
<img src="https://img.webnots.com/2016/01/sample-image.jpg">
</a>
</li>
<li class="galery">
<a class="caption" href="#" data-title="Here is a Title" data-description="Here is your short description">
<img src="https://img.webnots.com/2016/01/sample-image.jpg">
</a>
</li>
<li class="galery">
<a class="caption" href="#" data-title="Here is a Title" data-description="Here is your short description">
<img src="https://img.webnots.com/2016/01/sample-image.jpg">
</a>
</li>
</ul>
自定义图库小部件
此小部件使用 3 列并将图像大小调整为 200 像素 x 200 像素。 您可以更改包装器和图像大小以调整列并将图像放入其中。 确保悬停效果具有图像高度的 50%——我们使用 100 像素,因为图像高度为 200 像素。 单个图像可以链接到任何网页,我们使用 # 表示所有“href”属性,将 # 更改为所需的目标 URL。
了解有关使用画廊元素创建投资组合页面的更多信息。 此外,如果您正在寻找图像过滤小部件,请查看有关 Weebly 的 3 列图像过滤小部件的文章。