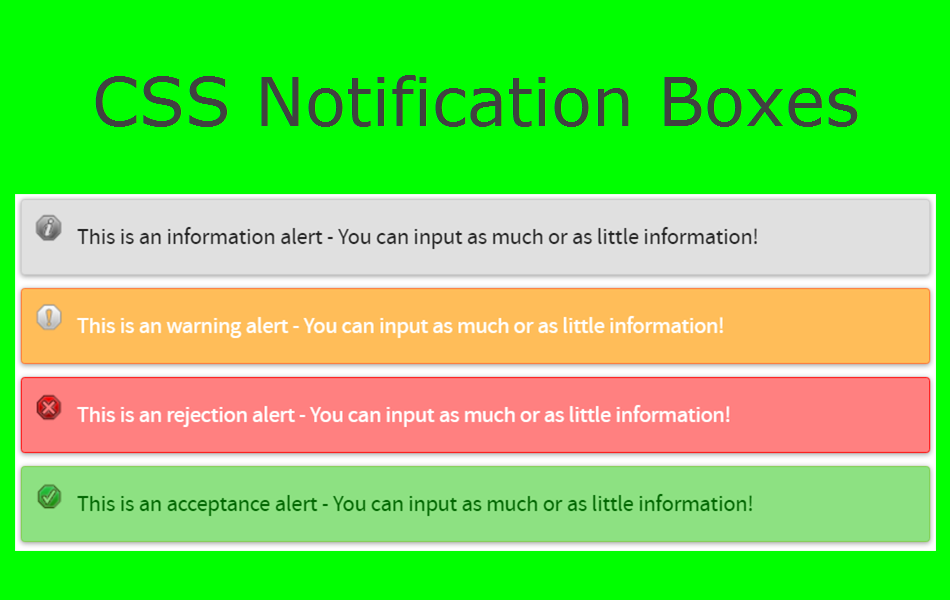
如何在Weebly站点中添加信息消息框
在Weebly 建站文章中突出显示重要信息有助于将信息成功地传达给用户。 通常,您可以使用消息框来展示提示、帮助、警告、警报和许多其他类型的信息。 像 Bootstrap 这样的框架提供了预定义的警报组件来添加这些信息消息框。 同样,您可以在 WordPress 等内容管理系统上使用插件。 在 Weebly 上,您可以使用简单的 CSS 创建信息消息框。 在本文中,我们将解释基于 Bootstrap 警报组件在 Weebly 站点中添加信息消息框。
推荐:如何在非响应主题中添加Weebly Pro标题幻灯片
信息消息框
我们将创建具有两种不同样式的消息框。
- 使用字体图标
- 使用小图标图像
如果您在网站上使用 Font Awesome,字体图标是不错的选择。 否则,您可以选择图像选项而不是字体图标。
信息消息框的特点
信息消息框将具有以下功能:
- 使用 CSS 制作并在移动设备上完全响应式自动对齐。
- 样式包括信息、成功、警告、危险、提示、帮助和公告消息的消息框。 您还可以根据代码定义自己的自定义消息框。
- 根据您的需要添加单独的消息框。 例如,当您要显示提示时,请使用“提示消息框”,而要显示警告,请使用“警告消息框”。 这可以在粘贴在“嵌入代码”元素中的 HTML 中进行控制。
- 可以根据需要自定义颜色和字体。
- 通知框的宽度可以扩展到整个屏幕宽度或缩短以适应内容长度。
1. 带有字体图标的信息消息框
下面是包含 CSS 颜色框和文本前字体图标的框的外观。

创建这些信息框的第一步是将字体真棒图标 CSS 链接到您网站的标题部分。 为此,请在您的 Weebly 站点编辑器的“设置 > SEO > 标头代码”部分下添加以下代码。
<link rel="stylesheet" href="https://stackpath.bootstrapcdn.com/font-awesome/4.7.0/css/font-awesome.min.css" integrity="sha384-wvfXpqpZZVQGK6TAh5PVlGOfQNHSoD2xbE+QkPxCAFlNEevoEH3Sl0sibVcOQVnN" crossorigin="anonymous">
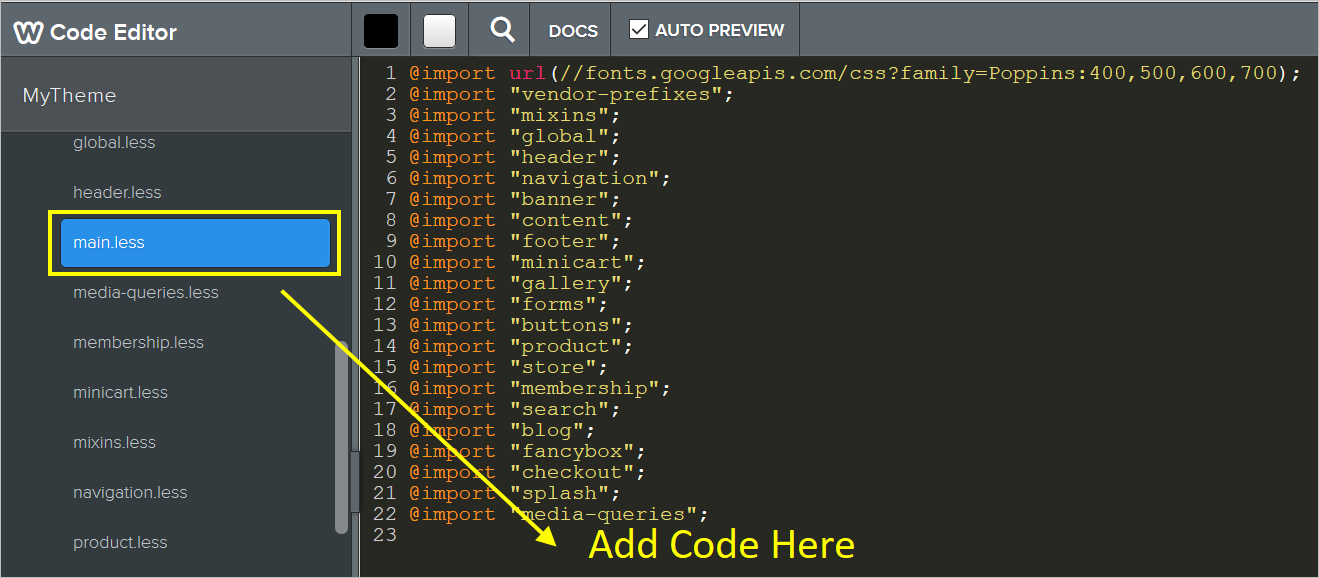
第二步是在“main.less”文件下添加CSS下面的代码。
.webnots-notification-box {
-moz-border-radius: 5px;
-webkit-border-radius: 5px;
border-radius: 5px;
color: #ffffff;
font-family: verdana, 'open sans', sans-serif;
margin-bottom: 25px;
padding: 10px 14px 10px 44px;
position: relative;
box-shadow: 0px 1px 5px #999;
/* width: -moz-fit-content;
width: -webkit-fit-content;
width: fit-content; */
}
.webnots-notification-box:before {
font-family: FontAwesome;
font-size: 21px;
left: 14px;
position: absolute;
}
.webnots-success {
background-color: #2ecc71;
}
.webnots-success:before {
content: "\f00c";
margin-left: -2px;
}
.webnots-failure {
background-color: #e74c3c;
}
.webnots-failure:before {
content: "\f00d";
}
.webnots-warning {
background-color: #e67e22;
}
.webnots-warning:before {
content: "\f12a";
margin-left: 5px;
}
.webnots-information {
background-color: #3498db;
}
.webnots-information:before {
content: "\f129";
margin-left: 4px;
}
.webnots-question {
background-color: #f1c40f;
}
.webnots-question:before {
content: "\f128";
margin-left: 2px;
}
.webnots-tip {
background-color: #16a085;
}
.webnots-tip:before {
content: "\f0eb";
margin-left: 2px;
}
.webnots-notice {
background-color: #bea474;
}
.webnots-notice:before {
content: "\f0a1";
margin-left: -1px;
}
添加 CSS 代码后,转到要添加信息消息框的页面。 通过拖动“嵌入代码”元素复制并粘贴以下 HTML 代码:
<div class="webnots-information webnots-notification-box">This is the info box - You can input as much or as little information!</div>
<div class="webnots-question webnots-notification-box">This is the help box - You can input as much or as little information!</div>
<div class="webnots-tip webnots-notification-box">This is the tip box - You can input as much or as little information!</div>
<div class="webnots-notice webnots-notification-box">This is the notice box - You can input as much or as little information!</div>
<div class="webnots-success webnots-notification-box">This is the success box - You can input as much or as little information!</div>
<div class="webnots-failure webnots-notification-box">This is the danger box - You can input as much or as little information!</div>
<div class="webnots-warning webnots-notification-box">This is the warning box - You can input as much or as little information!</div>
每个
标签涵盖了不同类型的消息。 例如,要添加成功框,只需添加以下 HTML 代码:
<div class="webnots-success webnots-notification-box">This is the success box - You can input as much or as little information!</div>
我们在这个例子中使用了 font awesome 4.7。 您可以通过替换 HTML 中的 CSS 和相应的类来使用版本 5 或 6。
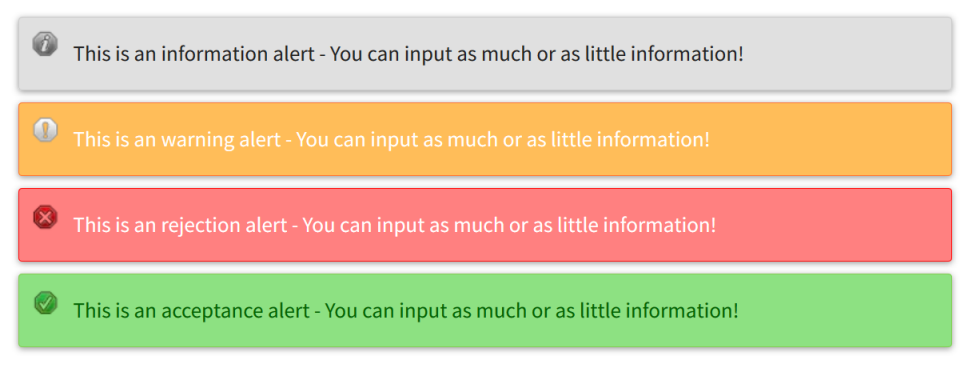
2. 带有图标图像的信息框
第二种样式的消息框使用小图像而不是字体图标,如下所示:
此小部件需要以下四个图标图像,右键单击并将图像下载到本地 PC。
在您的Weebly 建站网站的“主题 > 编辑 HTML / CSS > 资产 > 上传文件…”下上传图片。 上传的 Weebly 图像的文件路径类似于“https://your-site-name.com/files/theme/info.png”。 或者,您可以右键单击上传的文件并获取该图像的正确文件路径。
获得上传图片的正确文件路径后,在“main.less”文件中添加以下 CSS 代码。 不要忘记使用您的 Weebly 站点图像 URL 更新图像 URL。
.info_alert {
background-image: url(https://img.webnots.com/2015/10/info.png);
border: 1px solid #CCCCCC;
background-color: #E0E0E0;
padding: 15px 15px 15px 45px;
background-repeat: no-repeat;
background-position: 10px 10px;
border-radius: 3px;
box-shadow: 0px 1px 5px #999;
margin: 10px 0px;
}

.warning_alert {
background-image: url(https://img.webnots.com/2015/10/warning.png);
border: 1px solid #FE7736;
background-color: #FFBD59;
padding: 15px 15px 15px 45px;
background-repeat: no-repeat;
background-position: 10px 10px;
border-radius: 3px;
box-shadow: 0px 1px 5px #999;
margin: 10px 0px;
color: white;
}

.danger_alert {
background-image: url(https://img.webnots.com/2015/10/danger.png);
border: 1px solid #FF0F0F;
background-color: #FF8080;
padding: 15px 15px 15px 45px;
background-repeat: no-repeat;
background-position: 10px 12px;
border-radius: 3px;
box-shadow: 0px 1px 5px #999;
margin: 10px 0px;
color: white;
}

.success_alert {
background-image: url(https://img.webnots.com/2015/10/success.png);
border: 1px solid #83CD52;
background-color: #8DE182;
padding: 15px 15px 15px 45px;
background-repeat: no-repeat;
background-position: 10px 12px;
border-radius: 3px;
box-shadow: 0px 1px 5px #999;
margin: 10px 0px;
color: #060;
}
转到要添加消息框的页面,然后在“嵌入代码”元素中插入以下 HTML 代码。
<p class="info_alert">This is an information alert - You can input as much or as little information as you like within this section!</p>
<p class="warning_alert">This is an warning alert - You can input as much or as little information as you like within this section!</p>
<p class="danger_alert">This is an rejection alert - You can input as much or as little information as you like within this section!</p>
<p class="success_alert">This is an acceptance alert - You can input as much or as little information as you like within this section!</p>
如果你只想使用一个盒子,那么在
…
标签内使用对应的代码。
注意 Weebly 建站您有两个其他选项,而不是在站点“设置”的标题部分下添加 CSS 代码。 一种是在“main.less”文件下插入代码,另一种是在特定页面的标题部分下添加代码,仅在该页面上有效